You know those adorable onesies Henry has been wearing for his monthly birthday pictures? Remember how my friends made them for me?! If not, go
back here. Well, Sara and I loved the idea so much that we decided to do the same for the sweet Reneé who is expecting her first baby at the end of March.
Let me tell you that this was THE CRAFTIEST shower I've ever attended. Reneé has some very very creative and talented friends! She got crocheted booties, knit hats, hand-sewn burp cloths and bibs...it was impressive and inspiring. So clearly her friends were going to design some amazing onesies!
(note that crocheting was happening during the shower - love it!!)
I just love how they turned out:
Want to do your own baby shower onesie project like this?
Here's what you need:
-12 onesies, in various sizes that will theoretically fit the wee one at each "birthday" (I love Carter's brand!)
-Various fabrics for your guests to choose from. Girlie? All-Boy? You can have fun here choosing your color scheme or theme (Reneé didn't know the sex of her baby yet, but knew she was going to have woodland creatures in the nursery, so we used lots of owl/tree/leaf fabrics)
-A pack or two of
"Heat'n'Bond Lite" - find it here. You will use this to create iron-on pieces from your fabrics. Make sure you get "Lite" if you want to stitch the appliques on after you iron - for extra sturdiness.
-Several pairs of sharp scissors
-12 labels of some kind so guests know which month they're creating
-Iron and Ironing Board
-Optional: Number Stencils, Circle/Oval/Square Stencils, Any other stencils you think may be useful
Prep: (before the shower)
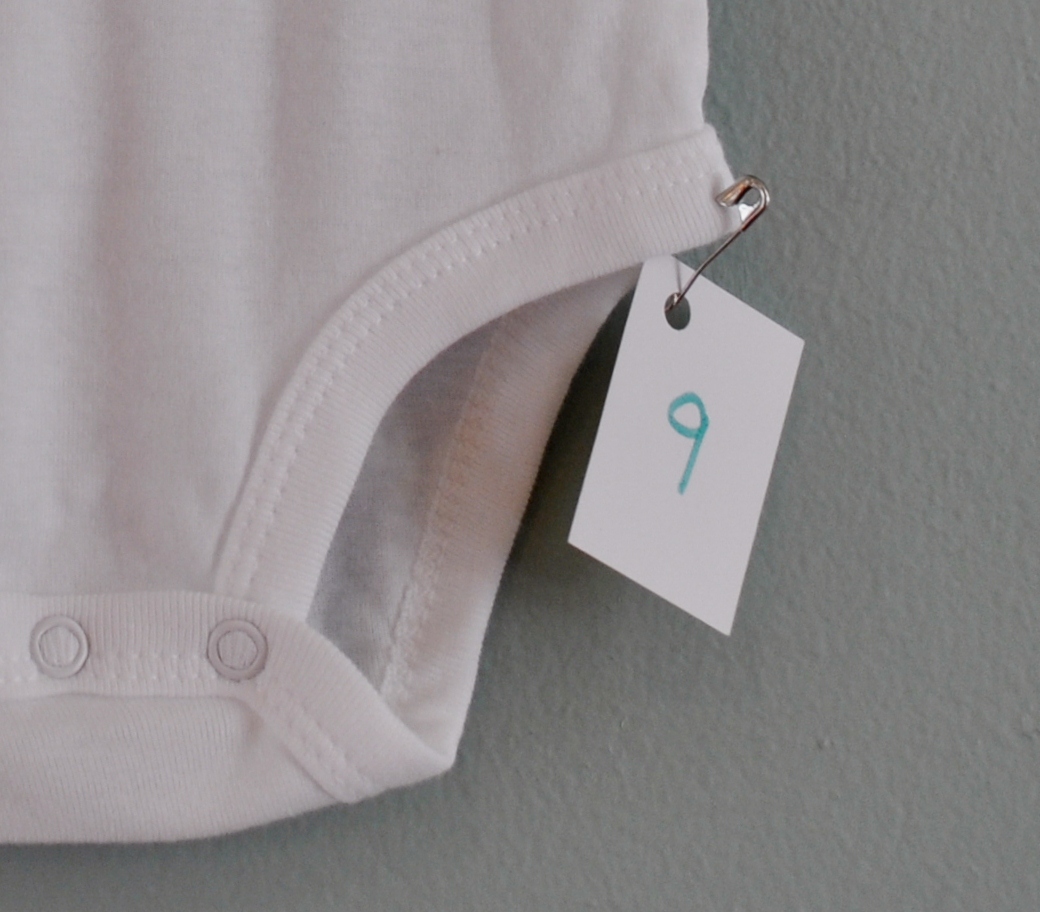
Label each onesie with the month it should be. I used safety pins/cardstock pieces like this:
You could also use sticky labels that could be removed later!
Cut large strips of your fabrics, about 7" x 21".
Cut strips of the Heat'n'Bond Lite, about 6" x 20" One pack (linked above) will give you 6 20-inch strips. So order accordingly - if you are using more than 6 fabrics you'll want more than one pack!
Iron the "sticky-ish" side of the Heat'n'Bond strips onto the WRONG SIDE of the fabric strips. Use the no-steam setting on your iron. If you have cut the pieces to the measurements above, you'll see that the Heat'n'Bond pieces are a little smaller than the fabric pieces - this is so you don't accidentally iron them to your ironing board, which is a sticky mess. You can trim down the excess fabric after ironing if you wish!
These strips are now ready for your guests! That's all you'll need to do until the shower.
Optional: You may want to experiment at this time with making a sample yourself so you can give your guests good tips and become skilled at ironing on the pieces...so you're not fumbling at the shower. :)
At the Shower:
Before guests arrive, set up an ironing board and iron station. Also set up a table with all the materials: fabric, pens, stencils, scissors.
Give each guest, or pair of guests -- if Mom-to-Be has lots of friends, a onesie. Explain that they should make a design that represents the number on the onesie they received. You could even print the picture of Reneé's onesies (
here) or my onesies (
here) to give them some ideas!
Then guests should...
Choose fabrics and stencils.
Draw designs directly onto the right side of the fabric with the water soluble or disappearing ink pens. Tip: larger, bolder pieces are much easier to work with than smaller, skinny pieces.
Cut out the designs, then peel off the paper backing.
Arrange the pieces as desired on the onesie.
Take onesie and all the pieces to the Ironing Board Station where the pieces can be ironed down.
Carefully iron the pieces onto the onesie just as you want them to appear when finished. You can overlap pieces too - no problem!
That's it! Super easy!
Optional: The ironed on pieces will stay put, but won't hold up extremely well to tons of drooling (the 2-5 month onesies will really take a hit) and washing. If you think the baby will wear them more than just for the one photo-op occasion, you can stitch the pieces down with a zig-zag stitch on your sewing machine. This can be done after the shower and then given to Mom-to-Be as a finished set. Not necessary, and a bit tricky, but they'll hold up much better!
Finally, this deserved mentioning...Reneé's mom had a special design in mind, and she even brought a sketch to the shower so she'd be ready to go. It didn't go with a particular month, but so what? We used fabric markers to write the words and to make the sun's rays. Don't you love this?!?
This lucky little one will be loved so very much. Can't wait to meet Baby Weston!






.JPG)
.JPG)
.JPG)
.JPG)
.JPG)
.JPG)



 Auntie and Cousin Love
 Can we just talk for a second about how much I love the people in this picture?
  I was a little worried that Bernie might take Henry's place in Opal's heart. But I think she has room for both. :) The shot above reminded me of....
 (Was that really almost 9 months ago??)
 Henry loves his new bro-sin so much! I'm hoping Bernie can teach Henry something about taking longer naps. Henry is going to teach Bernie about sleeping like a good boy at night...and about growing giant cheeks.


.JPG)
.JPG)
.JPG)


.JPG)
.JPG)
.JPG)
.JPG)

.JPG)
.JPG)
